HINTS AND TIPS
feel free to send me your hints and tips to share with us all. click here to email them to me.
Firstly a beginners guide to modelling
and from Brett Green’s Hyperscale site – how to remove decal film from Eduard decals
No 1 is from Kip Watson
Reproducing a carbon fibre finish on a scale model
At the start of a Formula l model build: I separate all of the carbon fibre parts and put them through my process to replicate a carbon fibre finish. I use Tamiya paints and clear colours:-
The carbon fibre process:-
Take a of sheet paper, spray one side with re-positional spray mount, stick fine nylon mesh to the paper then spray the mesh with the spray mount. This allows me to cut any size and shape of mesh to fit the part being processed. The spray mount allows the mesh to conform to compound curves it also depicts the stretches in the fibres that are seen on some of the real parts.
Use a base coat of semi gloss black for each part, each is then covered with the nylon mesh then chrome silver is air brushed very lightly from 4 or 5 inches. Removing the nylon reveals the carbon effect. This effect needs to be darkened down. This is achieved by airbrushing overall with thinned semi gloss black. The final step is a coat of clear gloss with a couple of drops of clear yellow to give that carbon fibre shine, and the subtle change of colour when seen from different angles.
No 2 is from John Levesley
I make my own waterslide decals using my computer, a drawing programme, an ink jet printer and water slide decal paper. I had bought stocks from Crafty Computer Paper but as of January 2018 I can’t contact them any longer. A very similar service is online from https://www.geckopaper.co.uk.
They have a product called Decalpro FX which means you can produce pale decals to go on dark backgrounds. The original art work can be done in black on white then a so called toner overlay is applied which produced a white decal if you use the white tone, yellow for the yellow toner etc. The decals themselves are rub down decals and are produced using a quite complex multi stage process.
There is a demonstration video at http://www.decalprofx.com/Vertical/1_MENU/1c_How_It_Works/How_It_Works.html
and specific details at http://www.pulsarprofx.com/DecalPRO/Vertical/3_LIBRARY/3b_Tips_and_Tricks/Double_White/Double_White.html
The examples given are quite large and complex but the customer photos show both 1/87th and 1/22nd models lettered using this method. There is one quote on the site from an 1/144th modeller who uses this system.
No 3 is from John Levesley
If you have a Windows phone look for these free apps; Humbrol Paint Converter and Humbrol Colour Finder. Humbrol Paint Convertor also runs on Windows 8 or later tablets and computers.
Humbrol Colour Finder allows you to view and select a colour on the prototype you want to use on a model through the phone camera e.g. British Army Khaki Green M3 or SCC2 Brown on a well-lit by natural light vehicle at Bovington. The app will then give you the nearest Humbrol colours that match the colour. The accuracy is adjustable to help you refine the suggestions. You can then order the paint from the phone via Amazon or Ebay shops.
Humbrol Paint Convertor allows you to select a Humbrol colour from a chart or by a search function and then you can find its match in one of the 10 other ranges inc Vallejo, Tamiya and FS standards. You can also select a Revell colour and compare it with a Humbrol Colour. If you want to compare any one of the 10 paint ranges against any other of the 10 ranges you have to pay for an upgrade. Humbrol Paint Convertor also allows you to view a prototype colour through a camera and get a Humbrol Match but for it to be useful with a laptop you would really need an external camera. It would of course work fine with a Windows tablet with two cameras but they are a bit rare.
I couldn’t find the app for Android, I couldn’t check iTunes
No 4 is from John Levesley
Easy (real) wood weathering. Into half a bottle of white or malt vinegar (not your best Balsamic) add a twist of steel wool. Leave for 24 hours, top up with water and shake to mix. Ether paint the wood or immerse the wood in the mixture. As the wood dries it will turn a weathered silver grey colour. Add a teaspoon of liquid black or brown shoe polish for more/different variety and depth of colour.
No 5 from John Levesley
this site is all about weathering American model railroad cars but there are some great cross-over tips usable by modellers in other disciplines. Look at www.theweatheringshop.com
No 6 is from Henry Goodall
How to model sea.
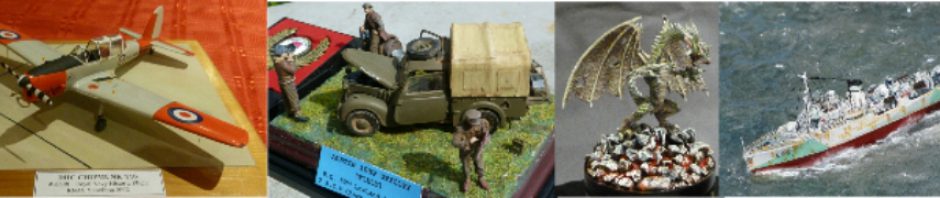
These notes relate to a brilliant Battle of the Atlantic diorama by Henry Goodall.
“For the sea, Henry used Deluxe Materials’ ‘Solid Water’, which is a two part mix of resin and hardener. This dries clear and does not shrink noticeably, over small areas, even if eventually 0.5” thick. It is best to apply it in ¼” layers, each allowed to dry completely, to prevent any shrinkage or bowing of the base. The only problem is that it is intended to represent static water, e.g. puddles, ponds and small streams, and takes 24-36 hours to set, depending on the ambient temperature. If worked after 18 hours into large waves or an ocean swell, the material simply settles flat after some hours. It has to be ‘worked’ again, very close to the time when it sets solid, with a smooth metal tool (knife handle, screwdriver or similar). Other materials, such as ‘clear’ silicone bathroom caulk, do not dry completely clear and may subsequently shrink.
The ‘Atlantic Ocean’ was poured into a makeshift mould made from scrap sheet plastic held together with Sellotape (some leakage was experienced!), on a clear plastic sheet base, from Formerton Sheet Sales, Southampton. The completed U-Boat was positioned, bow raised, when the material was almost set, and subsequently painted with clear gloss (as it was wet, having just emerged from the depths!). The base was then painted matt sea green underneath and, when dry, the depth charge under water explosions were simulated by sanding out roughly circular areas manually, leaving a natural gradation of colour at the edges, and then painting matt white over the bare areas. This gives the water three dimensional depth, as the viewer moves round the diorama, a more natural appearance than painting the sea surface directly and/or using crumpled kitchen foil or similar materials to ‘craze’ the sea surface to simulate waves.
The completed ‘water’ base was then drilled out for the two ship hulls, with much dry fitting, and Deluxe Materials’ ‘Making Waves’ was used via a syringe to simulate water along the ships’ sides, applied in small amounts to avoid cloudiness and surface tension ‘creep’ up the ships’ sides.
Denser than PVA glue, ‘Making Waves’ is excellent for producing smaller wave effects and simulating water running off the U-Boat deck; it is white when applied in thin layers but dries clear. Thick layers dry opaque white, which was ideal for building up the depth charge explosions. This was done over many days, drawing up the liquid vertically with a metal wire, into multiple shards, until it dried in place.
Bow waves and the U-Boat bow explosion were made by PVA glue laid on clear sheet plastic in suitable shapes and then transferred into position, when dry. The water pouring out of the U-Boat flood vents was simulated by pieces of curved clear scrap plastic, cut from a food carton, with ‘Making Waves’ applied on top, simulating water flow. “
No 7 Airbrush tips web sites
No 8 Modelling circular RAF Dispersal Pans – WW2 era
The plan below is of one of the still existing pans at the former RAF Airfield at Holmsley South in the New Forest, built in 1942

No 9 Painting small scale armour based on Dave Lovell’s notes and techniques

Viking’s Dave Lovell has a real talent for painting 1/72nd and 1/48th scale armour. Dave ‘s techniques for painting the model above are..
“I primed it with Humbrol rattle can “Primer”not the cheapest but I’ve never had any issues with it and if the kit you’ve just built is pushing a few bob I like to feel confident with what I’m using. Once dry I pre shaded with Tamiya NATO black my personal weapon of choice, then decided to finish the kit in IDF sand grey. This was taken from the Mig IDF paint set bought on our trip to Telford last year with this model in mind.
Firstly I mixed a small amount of the base colour with a little white and a drop of flesh to lighten it a little. I find the flesh helps to keep a lighter colour register with out the white giving it that mixed with white look. Using the airbrush I clouded in the larger panels to lighten the centres before spraying two very light coats of the IDF sand grey over the entire thing. Next up, the wheel rubber was picked out and the tracks given a couple of coats of thin rust coloured paint with a brush.
Next I mixed the high light colour again, touched in the nuts, bolts, hinges, and handles etc, using different amounts of the colours so that there was a visual difference looking around the model. At this stage it was beginning to look a mess, so once dry I gave it a coat of Mig filter, don’t hold me to it, but most likely the one for Tri Tonal camo, this settles the whole thing down and pulls it all together nicely.
Again, once dry I brush painted a coat of floor polish over the whole thing, when hard I could start to apply the washes. I think mostly the Mig one for NATO vehicles this was done in small sections cleaned off and pushed around with a brush dipped in cheap white spirit until I’m happy, this was repeated across the whole tank at the same time altering the colour of the hatches and re-highlighting a few bits and pieces. Whilst the floor polish protects and helps the washes to flow
By the time I reach the end the white spirit has washed most of it away. All tools and tow ropes etc were painted on the sprue and transferred to the kit at the finishing stages, as were the weapons on the turret, oh sorry after the floor polish the decals were applied and settled in with micro sol the one that melts them? Next the tracks were washed and brushed until they looked right.”
No 10 a video of an easy way to produce undergrowth mats for diorama bases
No 11 WW1 British uniform front line insignia.
Written as an addendum to a diorama showing the Sheffield battalion on the Somme in 1916. You can find details of the diorama on this site’s Hall of Fame post……
When I built this model I did not add any unit markings in the form of battle insignia. My research at that point had only served to confuse me as to what was worn and when. I now have Mike Chappell’s book “British Battle Insignia (1) 1914 -1918” published by Osprey. (Part 2 deals with the insignia of WW2). What I learnt from the book was that 1916 was a year of change in that the identify of units was being made less obvious for greater security. To grossly simplify the books content; Divisions, Brigades and Battalions adopted coloured symbols on their equipment and uniforms to identify who they were. Some divisions applied their symbols only to vehicles and equipment, others had a divisional badge on uniforms as well. Brigade and battalion badges were worn on uniforms, positioning varied. In the front line the wearing of regimental insignia was discouraged as it helped the enemy identify the unit.
It is most likely that when the Sheffield Battalion was in the front line they would not have worn either a Y&L badge or their metal Sheffield shoulder badges. The 31st Division did not, it appears, have its badge on its soldiers’ uniforms but both a brigade badge and a battalion badge was worn. The 94th Brigade badge was carried on the upper back and was a cloth square, red over white. The Sheffield Battalion, the second battalion of the third brigade in the division, wore a green circle on their upper arm. It’s quite likely that a coloured flash/symbol was carried to identify each company but so far I haven’t been able to identify those.

Finally another scan through the history of the Sheffield Battalion reveals a contemporary record that the night before the attack the soldiers backpacks were decorated with a shiny metal triangle to help observation posts track the progress of the troops. Since the photographs in the posting were taken I have added Brigade and Battalion badges and used the same lead foil I used for the rifle slings to reproduce the shiny triangles on the backpacks.
No 12 Splattering mud onto a military vehicle model – Trevor Griffths
")
")
I tried something I have never done before that is the mud splatters on the vehicle, I have seen it on You Tube so decided to have a go, basically paint is loaded onto a brush and just using the pressure (about 1 bar) from my airbrush hold the brush close to the vehicle/model and spray it on. It was a first for me but luckily it did work and I will be using this method again.
No 13 Basing materials (not off the shelf ) by Paul Seeley
Following on from a discussion at the last meeting I thought I’d share some of the materials which I regularly use for my model figure bases. It’s not that I’ve got anything against the very neat (and expensive) packets of stuff that are available from model shops, it’s just that I think that there is a lot of stuff which looks better that ‘summer green static grass’
For the main landscaping I use DAS clay which can be built up in pretty thick layers and is very durable. I’ve found Polyfiller is fine, but when applied thickly it cracks and flakes. Once you’ve got the basic groundwork shaped and dried the fun starts . . . .
Now a photo of what I regularly turn to for textures and grasses.

On the top row (L to R) we have –
Moss – These can be easily found around the bases of trees or fences. I’ve treated these to a coat of thinned PVA. They can also be painted with your usual paint once in situ.
Dried herbs – Oregano, thyme and whatever else takes your fancy. Crushed up they add a nice texture (But don’t tell the wife)
Balsa dust/sawdust – Mine’s been dyed with thinned acrylic.
Coffee grounds – Yes really! The best and easiest way of making a rich soil to go under your static grass.
Garden twine – Unravel and add a spot of superglue to a clump to hold it together and then drill a hole in the base. Voila rough long grass.
Middle Row
Crushed autumn leaves – Sprinkle around or add to a pva and soil mix for a lovely basic ground cover
Road dust – Top material found at the edges of roads for free! Sieve it out for a sandy base or use as is for everything else. My go to material.
Compost – Yep real soil to look like soil. A handful spread onto a baking tray and baked at low heat for a while to kill any living nasties and fungus that might be in it (Don’t use your other halves best baking tray unless you want an ‘interesting’ conversation)
Roots – Any gardeners will be digging up all sorts of goodies at this time of year. Roots and twigs are excellent modelling materials
Coarse wood dust/chips – Again this has been dyed, but it’s easily coloured and adds texture
Stones/pebbles – A handful of these will provide the best ‘rocks’ you’ll ever see on a model base
Lastly for those that want a bit more leaf detail I’d recommend these punches which come in different scales and leaf types. The last container are leaf shapes made using one of these and a couple of autumn leaves collected from the woods.
No 14. Blink detected (Or how I paint eyes) by Paul Seeley
First off can I say please don’t use white for the eyeball . . . . EVER!
Okay having got that out of my system let me say that not using pure white is the easiest way of avoiding a ‘toy soldier’ look on a scale figure. I usually use Light flesh (928) for the whites of the eye (Sclera if you want to be pedantic) on a ’Northern European’ skin and basic skin tone (815) for the whites on a ‘Mediterranean’ or darker skin.
1) Start by painting the eye ‘white’ in your chosen colour
2) Paint the iris in a blue or brown keeping them about the same distance apart as the outside corners of the mouth. Have the eyes looking slightly to one side or the other makes it easier to judge the spacing and gives life to a figure.
NB If you are right handed paint the left eyeball first then the brush isn’t covering what you’ve just painted and you’ll find it easier to get them both looking in the same direction.
3) Next add an upper eyelash in dark brown noting that most eyes are not almond shaped. A short line at 45 degrees on the inside of the upper lash then curving the lash around the rest of the upper lid gives a nice ‘masculine’ shape to the eye.
4) Add the bottom lash in a slightly dark skin tone. (This can be an almost straight line)
Set this aside to dry whilst you block in the rest of the face then take a breath because it gets a bit tricky . . . .
5) Mix a blackish colour (say with dark brown and dark blue) add a little glaze medium to it and put in the pupils with your very best brush. (The glaze medium slows the drying time enough that you can wipe it off with a clean damp brush if it’s in the wrong place without disturbing the rest of the eye) Leave the pupils to dry.
6) Finally add a ‘catch light’ to both eyes in pure white just off the pupil in the iris – This step might drive you nuts and I’ll often have to re-do it a couple of times before I’m happy, but it adds a real lift to the whole face. (If you really are struggling with this then a drop of gloss varnish over the whole eye will help instead)
Sit back and admire! (The title, by the way, comes from a comment at one of the club meetings when a member’s camera was having a few ‘difficulties’ photographing the face on one of my figures)

